LIfesong Wilderness Adventures

Wilderness Survival Training for Adults in Oregon

  • Survival Skills Training
  • Oregon Survival School
  • Custom Survival Training
  • Contact Us
    • Registration Policies
    • FAQ
    • Getting to Camp
  • About
    • More Services – Gear, Rentals, etc.
      • Business Information
      • Privacy Policy
      • Recommended Links
  • Calendar
    • Media & Press
  • BLOG
    • The Philosophy
    • Outdoor Survival School
    • Plants
    • Survival Gear
    • Tracking
    • Teen Adventure Camps

Jan 04 2018

Survival Trick Enjoy the Little Things

Survival Trick Enjoy the Little Things

Enjoy the little things is a survival trick that works. And a consistent theme with the graduates of our 28-day teen apprenticeship course.

Survival trick enjoy the little things

And Khalil is no exception. Khalil Edson first came to us as a student of our 28-Day Teen Apprenticeship program. I am proud of all my students and staff who have discovered for themselves the grit it takes to overcome obstacles and challenges along the road of life.

I'm particularly proud of Khalil for he has shown with each new challenge, the mindset it takes to overcome and thrive. This then is a story of Khalil about his time with us in the wilds of northern California.

"Hey Mark, it's Khalil, I’m going to college on the island of Palau near the Philippines and really enjoying it.

Just recently, I began scuba diving, have done a bunch of fishing, and have pretty much just been exploring. Recently I was assigned to write a narrative essay, and my topic was based on your camp and a particular experience I had there last year. I want to share it with you and your students. I will be back home in California sometime in May.

High Camp

It was the beginning of July, and I was in beautiful Northern California at High Camp overlooking Mount Shasta. This was my second time participating in a twenty-eight day camp into the wilderness with Lifesong Wilderness Adventures and Mark Wienert.

My first time, I started as a student and I fell in love with the experience. This summer, I could not refuse Mark's invitation to return as a staff member.

My experience in the outdoors goes back as far as I can remember. That, along with these two past years at camp has made me consider myself a ‘survivor’. And that is what I was doing, once again, in the wilderness of Northern California.

Survival Trick. How to overcome difficult situations

Surviving is a very general term. It can be used to describe so many situations. In essence, it is using what you have to overcome difficult situations you are faced with. One night during those twenty-eight days, I was faced with a lot of struggles that taught me two important life lessons that I still reflect on today.

Life lesson one. Your body can stand a lot more than you think

My group and I were on an overnight survival trip where we brought a minimal amount of supplies in order to test our bodies and push our comfort levels. We did not bring any tents or sleeping bags, only a knife, a small amount of food, clothes, our backpacks, and a few miscellaneous items like bug spray and sunscreen.

Survival trick to sleep

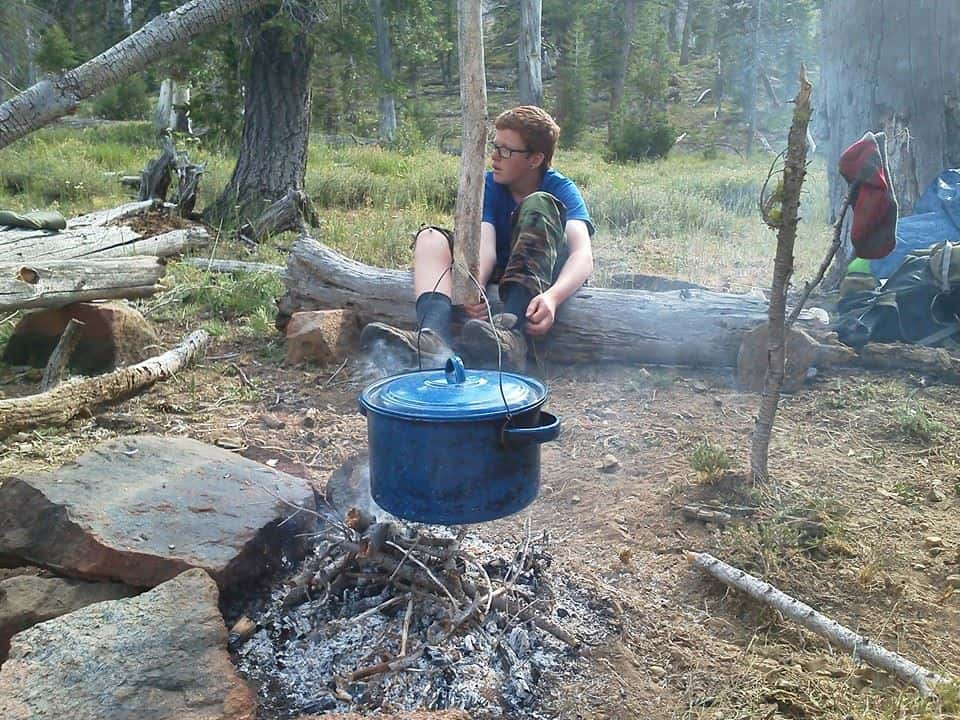
We set up camp just before sundown, decided where to sleep, collected water, and started a small cooking fire. Once we finished our dinner of just two potatoes and flour cooked into bread over the fire, we settled down for bed. The sun was down and the cold night air was prevalent. A survival trick we had learned from Mark was to sleep while digesting our food so we could get that little extra added warmth needed to sleep. I fell asleep immediately.

We did not account for how cold it was going to get. I was abruptly (nature can really be rude) awakened by furious gusts of wind and near freezing temperatures. It was a struggle to go back to sleep.

To stay warm I ate trail mix and did push-ups

To stay warm I ate trail mix and did push-ups, which only worked short term. I would sleep, wake up, do push-ups, and repeat. Once it was around 4:00 am in the morning I’d had it. I gave up on trying to sleep.

Life lesson number two, enjoy the little things

There was no escape from the cold. I bundled up in all my clothes, powered down water and trail mix, did push-ups, and just waited for the sun to come up, for the wind to die down. I waited and waited. My prayers for warmth and relief went unanswered. Life lesson number two, enjoy the little things in life. My prayers were not being answered, so I took matters into my hands and started a fire which was hard because my extremities had started losing some function.

The fire brightened up all the dark

Once the fire was all set and flames were roaring, the fire brightened up all the dark, shadowy unknown objects, adding an orange glow to everything in sight. I was content. The fire made me comfortable with my surroundings. The fire brought back familiar warm feelings of home instead of pure darkness and toe-numbing weather. I ended up drifting back to sleep, and my fire died down.

It was one of the toughest, most uncomfortable nights

When I awoke to the sun shining right on my face, instantly warming my body. I began removing layers of clothes immediately: two sweaters, a jacket, a beanie, a few pairs of socks, and a few layers on my legs were no longer necessary. It was crazy how drastically the weather changed. It was one of the toughest, most uncomfortable nights I had to endure, but in the end, it made me stronger because I saw how far I could push my body if needed.

Conclusion

The world tries to teach you lessons in very odd ways. The secret is taking them with your best foot forward so you can learn and grow. That arduous night in the cold taught me I can endure more than I thought, how to solve problems right in front of me, and an appreciation for the small pleasures in life—like a warm fire and the morning sun shining down on me."

Thank you for having me at camp Mark.

-Khalil Edson

  • Prepare for Winter Driving
  • How to Harvest Elderberries
  • We Train Here

Written by Mark J. · Categorized: Outdoor Survival School, Teen Adventure Camps

Oct 17 2016

Staying Alive in the Wild

Staying alive in the wild!

Staying alive in the wild requires learning emergency shelter building. The Debris Hut is an example of a survival shelter that can be built without a saw or ax. All that is needed is an abundance of debris at your shelter location. Make sure the spot you choose for your debris hut is plentiful in leaf litter. The lack of leaf debris will make this shelter useless in wet and wintry conditions. Emergency survival shelter training will prepare you.

Staying Alive

Some shelters can be built using no tools. These are important survival skills to learn.

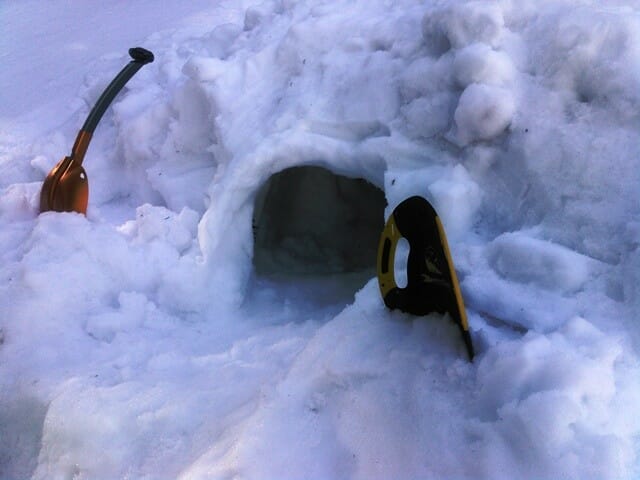
A snow cave for winter shelter
Snow Cave.

Snow shelters

During freezing conditions when enough snow is available the snow cave will save your life. Especially if you need shelter above timberline. On the ridge of a mountain for example. The best way to dig a snow cave is with a snow shovel. But, if you don't have a snow shovel, you can use  emergency snowshoes, tent poles, or your hands to dig.

Lean-to shelter uses a warming fire to heat shelter
emergency lean-to shelter using a warming fire to heat shelter.

Emergency Lean-To Survival Shelters

Winter Survival Lean-to shelters use large amounts of firewood during bitter cold weather. Failure to build a warming fire heated lean-to shelter correctly will make for an uncomfortable night.

Lean-to shelters use the radiant heat of a warming fire to heat the shelter. Thus the wall or back of the shelter must be right up and close to the body to be efficient. The wetter the conditions the steeper the back wall.

Most people build this type of shelter wrong and never stay warm. Even with a fire.

  • How much firewood do you need? A good rule of thumb is to estimate the amount firewood you will use, then double or triple that amount. You don't want to run out of wood to burn after night falls.

Make drinking water safe

Shelter location

Shelters built-in low areas along rivers and streams may flood. Standing dead trees, stinging insects, and poisonous plants all pose a risk to the unwary. So, a good shelter in a poor location is still a poor shelter. Survival skills teach you this.

Staying alive in the wild

Using grass stuffed under clothing to insulate from cold
Scarecrow emergency shelter technique using grass as insulation.

Survival Skills

Most of all, staying alive in the wild is due to your ability to apply experience to the conditions at hand. A 'never give up' attitude and your ability to think positive in your new reality will make you a survivor. Hence, survival skills and survival training can help you make it out alive.

Adult Camps. Teaching wilderness survival and nature awareness since 1994.

More Articles on Outdoor Survival Training

  • Oregon Survival School
  • Winter Survival Training
  • Your Car slid off the road. Now what?

Written by Mark J. · Categorized: Outdoor Survival School

Nov 12 2013

Make Drinking Water Safe

Making Drinking Water Safe in an Emergency

Learn how to make water safe to drink during an emergency. Water must be potable, drinkable, filtered, or boiled, to be safe to drink.  Otherwise, you could become debilitated with Giardia or other waterborne disease. Water, you need it to survive. If you are in an emergency right now. You will need safe drinking water to hydrate your body. Cooking and sterilizing food and water in a survival emergency will keep you safe. Lifesong Wilderness Adventures Survival Training teaches you how.

Make Drinking Water Safe - in an emergency

Emergency Disinfection of Drinking Water

  • The simplest and quickest way to make water safe to drink, is by boiling.
  • Boil water in a food grade metal container. Any typical kitchen pot will do.
  • Bring water that is not contaminated by motor oil, petroleum chemicals, or radiation, to a rolling boil.

Now you now have drinkable, potable water, which is 99.9% safe to drink. Bring the water to a rolling boil, that's it. You're done.

Pre-filter water when needed

Pre-filter water when needed. If the water has turbidity.  Which means water is cloudy, has suspended particles, muddy, dirty, soupy, or stagnate. Or has human or animal waste in it.  You must first pre-filter. Pre-filter contaminated water by running it through a pre-filtering system.

Use cotton clothing for pre-filtering dirty water

Water pre-filtering can be done easily by using clothing. As an example, a cotton t-shirt works well as a pre-filter. The tight weave of the cotton catches and holds solids and grit particles on the fabric. Thereby restricting a high percentage of suspended particles from getting into the water you are going to boil.

In an emergency a cotton t-shirt, handkerchief, even socks work as a filter

Sometimes you may have to filter water that is very dirty through your makeshift pre-filter a couple of times. That's okay.

For best results, fold your handkerchief filter in half, and be sure to run the water through the filter until the water is clear. Then boil it.

After boiling, then drink the water when it has cooled. That's all there is to it.  Simple.

Pre-filtering using pants or trousers as a makeshift water filter

The US Military developed an emergency water pre-filter by hanging a pair of pants off a branch or tripod.

  • Tie off the bottom of one pant leg.
  • Fill that leg with about four inches of crushed wood charcoal.
  • Next, add 6 inches of river sand,
  • Then add double that volume of coarse gravel.

Repeat the process one more time for an efficient pre-filter for contaminated water made from a pant leg.

Bring pre-filtered water to a boil in a metal container, let it cool down, then drink.

Pre-filtering water in this method does not take the place of boiled water treatment.

Pre-filtered water must still be brought to a rolling boil to make it potable and safe to drink.

How much potable water will you need to keep hydrated?

Lots. A minimum of two to four liters a day for adults. In extreme heat and high humidity, you will need to drink twice that volume. Keep drinking disinfected water until you are no longer thirsty, and your urine is mostly clear and not yellow.

That is an easy, and straightforward way to keep track to know if you are hydrated.

Sanitize eating utensils and clothing by boiling in water

You can also boil your dinner ware. Boil knives, forks, spoons, cups, mugs, sterilizing them from 99.9% of harmful bacteria and viruses. You can even boil your clothing to help reduce the spread of disease in critical emergency events.

The Simplest and Safest Way to Treat Water During an Emergency is by boiling in a food grade metal container.

Cooking food

What about food? Yes, most importantly you will want to bring all your food; survival stew as an example, to a boil before eating. Soup is a great meal during an emergency. As soups are made up in large part of water, this helps with hydration and the boiling temperature kills 99.9% of viruses and bacteria.

What happens if I can't boil water to make it safe?

In the event you can't boil water then take all the safety precautions you can to reduce getting sick from contaminated water.

Always pre filter contaminated water first. Pre-filtering does not make water safe to drink, but filtering can reduce the number of organisms that can make you sick.

Allow suspended particle to settle to the bottom first before drinking

So, if you cannot treat water by boiling then, pre filter the water first into a container. Let the water sit undisturbed, allowing suspended particles in the water settle to the bottom. Best drunk if no cloudiness is visible.

After an hour or more, drink the water. Being careful not to disturb the settled particles at the bottom of the container.

Using the Sun's rays to treat water

If you have a sunny day and are using a glass jar to drink from. Let the glass jar sit in direct sunlight while you're waiting for the suspended particles to settle. The solar exposure will help kill some of the problem bacteria and viruses. Thus, reducing some of the risk of contamination.

To use sunlight to completely sanitize and fully treat drinking water. You must use a clear glass jar with an accumulative exposure of direct sunlight of at least 8 hours. Partly cloudy or cloudy days don't count. The contaminated water must have a full 8 hours of direct sunlight for treatment.

More information available on making water safe to drink in an emergency at the US Government EPA website.

Read on!

  • Oregon Survival School
  • Gear for a Wilderness Survival Weekend

Written by Mark J. · Categorized: Outdoor Survival School, Survival Gear

Feb 08 2013

What should I take for a Wilderness Survival Weekend

Gear List

Here is the recommended gear list for our overnight Survival Skills Weekend and First Circle Survival Camp. All items on the checklist below are important for an enjoyable and comfortable wilderness survival weekend experience.

Gear List

  • tent, ground tarp, and sleeping pad. Rent a tent/pad, and a carving knife for camp
  • sleeping bag, pillow
  • cook stove - single burner propane camp stove or other
  • stove fuel
  • cook pot - mess kit - with handles - lid
  • pot lifter - pan handler or Hot pad -
  • eating utensils - cup for hot drinks, bowl, plate, flatware
  • water bottle - minimum one-quart or liter - NO GLASS. Because glass is a safety issue when it breaks.

Survival Camp Gear List Continued

  • knife - non-folding, 4-6” fixed blade preferred. Serrated edged knives are not recommended
  • flashlight or headlamp – with extra batteries
  • towels – we do not provide hand or bath towels
  • toilet kit – personal hygiene biodegradable products, toilet paper, personal medication

Personal Medical Kit

  • medical kit - band aids, triple antibiotic cream, gauze, tape
  • bug spray
  • sunscreen
  • dark glasses
  • prescription medication

Wilderness Survival Weekend Clothing list

  • clothing layering - for warm and cool conditions
  • socks - wool blends are best - 3 pair
  • swimwear - for showering/bathing
  • footwear - sturdy all-terrain shoes for comfort and safety
  • hat - sun - rain- warmth
  • rain gear - example poncho
  • bandanna - uses vary
  • gloves - mittens for cold and wet - leather gloves for carving.

Luggage, Notebook, Etc.

  • day pack (Or what ever you have)
  • notebook
  • pens/pencil
  • camera/optional

What should I take for a wilderness survival weekend?

  • Buy camping gear cheaper at the thrift store.

We encourage you to use your local thrift store for many of the items listed above. Many items may be acquired inexpensively..

Visit the FAQ's page for links to gear and outdoor clothing.

What foods should I bring to camp?

You will want easily prepared snacks and meals for your food kit. Prepackaged meals are popular to bring; just add hot water for a quick and easy meal. A wide variety of prepackaged foods are available online or your local outfitter.

  • canned foods & can opener - beans, fish, veggies, beef, soups
  • dried Meat - jerky, salami
  • dry cereal - powdered milk
  • instant soups
  • MRI’s (meals ready to eat)
  • crackers - cheese
  • bread - tortillas
  • peanut butter - jelly - jam
  • fruit - dried, fresh
  • nuts - GORP (good old raisins and peanuts)

Meals for camp

Get creative and cook your favorite meals at home. Freeze your pre-made meals in recycled containers and bring them in a cooler with you to camp. Much better eating and nutrition than commercially prepackaged foods. Plus, you’ll enjoy great food savings.

Camp stove

Bring your backpacking or camp stove with you to prepare meals and heat water.

Feeling bold? Try out my original Accidental Sourdough Starter recipe before coming to camp.

Pack it in - Pack it out, Thanks!

More Survival Tips

  • Get Ready for Winter Driving
  • Weekend Survival School
  • Oregon Survival School

Written by Mark J. · Categorized: Outdoor Survival School, Survival Gear

Dec 31 2010

Bear Grylls Desert Island

Bear Grylls Desert Island on Raft

"Hawaii Five-O", it isn't. And commuting to work on the busy Oahu interstate made this mountain Man think fondly of home. On the other hand, the best thing about consulting for a British TV production crew is if you are lucky enough to land a gig like this. These Brits love great food and a proper pint of beer. Eating decent food on the run is number one with me. I see my chances of survival with Bear Grylls are looking good!

Bear Grylls Desert Island and I'll have a pint of that!

Humble Pie

A funny thing about being an expert... they hire you as one, and then they ignore everything you say.

Some may think that working as a survival expert for Man Vs Wild is exciting. Well, it is most of the time. For instance, pointing at people, places, and things and saying such phrases as," no, no, no, that is really tacky."

Or perhaps, "what could you be thinking of?" And this one of course, "if you insist on eating that poisonous plant, I can guarantee you a slow agonizing death."

The Director

Whoa, the director is in a class all by himself. He will ask wonderful things of you in a polite and professional way only once. Once is all you get.

As we were slurping our beers one night in a swinging Hawaiian hot spot. Here, young men come from all over the world to drink and vomit in the urinals, We met up with another film crew on their way back home.

"Mark, give the director exactly what he wants, nothing else will do."

I asked the director if he had any words of wisdom for me, and he did. He said, "Mark, give the director exactly what he wants, nothing else will do." "Cheers, and good luck," he said, and off he went leaving me curiously pondering what this could mean for me.

The Director the Raft and the Cruise

Some directors inspire you. "I need you to build me a raft, Mark Ole boy, two rafts to be exact.” The Director cheerfully stated looking straight into my eyes. He went on: "The rafts must be built by hand using a dull knife and your teeth if you must. And use all-natural materials, completely rigged and outfitted for a cruise.” “A cruise?” I choked.

Breaking Wind

"This raft must be able to sail into the wind. Oh, and survive a journey of at least fifty miles out to sea. Mark, can you get this done in one week, please? And oh, make them so we can take them apart and put them quickly together again, yes? One more thing, make sure both rafts float!” What could I do?

I remembered the wisdom of the other director, nodding my head up and down quickly, and planting a smile of "you betcha can do it" on my face. Off I went in search of a how-to book on "Building a Raft in 48 hours... that floats."

The Crew

Bear Grylls and the crew are some of the finest folks I have ever had the pleasure of working with. Professional, considerate, generous, and dedicated to the work of bringing you exciting TV entertainment.

Bear Grylls Desert Island Raft

I'm proud of the raft we built. Bear Grylls was truly kind in naming the raft after my head of staff who couldn't make the Desert Island episode. The deck of the raft frame was made from bamboo I harvested from a forest on Oahu.

I seem to remember getting a boil on my elbow after returning home from this project. The Doc said it might have something to do with bacteria found on bamboo. Anyway, that's another story.

Chinese Sailing Rafts

The raft design I produced was based on ancient Chinese sailing rafts. I read a fascinating article about these sailing rafts in the Bulletin of Primitive Technology. I had to try it.

The Chinese sailing rafts were designed in such a way that the hull of the raft became part of the wave. Through the ocean waves, the logs ride smoothly and steadily.

Twin Hulls

I decided on twin hulls built of wrapped bundles of bamboo logs which would increase buoyancy. Also much easier to cut, transport, and bundle for one person than to do so alone with large, heavy logs.

The hulls had a gap between them. This I concluded, would reduce wave friction allowing for water to pass through quickly allowing greater performance over the classic log raft design.

Bolo Knife, Folding Saw, and Fire

The raft did its job. Though after several trips out into the ocean, the hulls began to loosen from being towed behind a motorboat. With a folding saw and a Bolo knife, I cut the bamboo by hand. Once the raft poles were on the beach, I used a traditional technique using fire to burn the poles to the lengths I needed.

Bear Grylls Desert Island Challenge

I enjoy taking on a challenge and this raft-building business is right up my alley. Exciting stuff for a survival skills instructor and television consultant. Or those brave students who share my feelings about advancing one's knowledge of outdoor survival skills.

I had never been to the Hawaiian Islands before and my experience with the flora and fauna was at best limited. Lucky me. I got to make the trip to paradise a few weeks earlier than the film crew. No fuss about it. I got right to work.

The Shrub that Binds

I read up on the shrub Hau, a member of the Hibiscus plant family, and also a Canoe Plant. And found it particularly useful for building rafts. The bark cordage is called `ili hau, and has strong fibers for wrapping into rope. I also discovered that it was the most suitable wood for the Polynesian fire technique, the Fire Plow.

Hau also works perfectly with the Bow Fire technique of friction fire. A bow cord can be made from bark, and a spindle and board can be made from wood.

The wood is light and if one had access to larger trunks, one could bundle smaller logs together. It would make a great raft due to its lightweight and buoyancy.

Banana Tree Fiber

One early morning as I was organizing my raft material on the beach, I saw a good-sized tree trunk that had washed up overnight. I had to investigate. I could tell by the aging of the log that it had been in the water for quite a while as the log was rotting.

As I looked closer, I discovered the inside of a banana tree is not made up of solid wood like a pine tree. The whole inside of the banana trunk is fibrous. I was ecstatic. I wanted to use as many native materials as possible in wrapping the raft together.

Banana Tree

I discovered that the banana tree is not a tree after all. Bananas are a member of the grass family, Musa paradisiaca. Now I understand why the inside of the log was rich in fibrous strands.

In the End

The banana fiber was a gold mine of course, long fibrous strands that could be easily twisted and wrapped into rope. Using mostly banana fiber and some Hau we twisted the fibers into rope and tied the bamboo poles together.

It was a job working from daylight to dusk. But we got it done. And the most rewarding part, it was a team effort. And even better still, it was fun!

First Circle Camp. Making it Real!

Emergency Shelter Class

Bear Bears Ursus

Written by Mark J. · Categorized: Outdoor Survival School

  • « Previous Page
  • 1
  • 2
  • 3
  • 4
  • Next Page »

Lifesong Wilderness Adventures

PO BOX 149
Blue River OR 97413

Monday-Friday 9AM-5PM PST

Contact Mark

Privacy Policy - Media and Press

Lifesong Wilderness Adventures Oregon Survival School Logo.

Sitemap

Guide Outfitter Recognized Professional Mark J Wienert.

Guide Outfitter Recognized Professional

Mark J Wienert

Copyright © 1994-2026 · Lifesong Wilderness Adventures · All rights reserved.