LIfesong Wilderness Adventures

Wilderness Survival Training for Adults in Oregon

  • Survival Skills Training
  • Oregon Survival School
  • Custom Survival Training
  • Contact Us
    • Registration Policies
    • FAQ
    • Getting to Camp
  • About
    • More Services – Gear, Rentals, etc.
      • Business Information
      • Privacy Policy
      • Recommended Links
  • Calendar
    • Media & Press
  • BLOG
    • The Philosophy
    • Outdoor Survival School
    • Plants
    • Survival Gear
    • Tracking
    • Teen Adventure Camps

Aug 19 2022

How to Brain-Tan a Squirrel

Learn how to brain-tan a squirrel you scraped off the pavement or harvested during hunting season. Our goal is to turn the rodent's hide into a soft, beautiful pelt. As the title implies, we use the squirrel’s brain to brain-tan its hide. So, save those brains!

How to Brain-Tan a squirrel hide using its own brains.

How to Brain Tan a Squirrel

This request comes from one of our students who is interested in brain tanning a squirrel hide.

He said, "I wanted to share and get some tips (although by the time you reply, I will have already started to get my hands dirty, I'm sure) on skinning a squirrel. I picked up a nice roadkill today. It was getting late, and I did not want to work outside, so I submerged him in a bucket of cold water. It is tomorrow's project."  ~Chad

Roadkill handling tips

First, three things you want to be aware of when harvesting any roadkill.

  1. Check your state's fish & game laws about removing dead animals from the highways for personal use; in many states, it is illegal. (Check with them for a permit; it should be free.)
  2. Wild animals carry all kinds of nasty critters like ticks and fleas that stay in the fur after the animal has expired. Store sturdy plastic bags in your rig with disposable gloves for handling any roadkill you may come upon.
  3. I recommend disposable gloves throughout the tanning process. If you have cuts or scratches on your hands, they can become infected without proper protection.
Teen Survival Camp staff wearing soft brain tanned mouse headband.
Chris Gumper, head of Staff during Survival Camp for Teens, wearing his brain-tanned ground squirrel and mouse headband. 

Squirrels, ground squirrels, and mice are brain-tanning projects to start with.

What is tanning?

What is Tanning?  Briefly, tanning is the process that takes a raw animal hide or skin and turns it into leather. Deer hides produce a choice Buckskin using this same process.

How to remove the squirrel hide from the carcass

  1. Remove the hide from the carcass of a squirrel by carefully slicing the animal from the chin, down the belly, to the almost anal end.
  2. Cut around the genitals and anal area with care, not to cut into the internal organs.
  3. Continue cutting along the underside center of the squirrel’s tail to the tip. Removing the hide from the tailbone is tricky as it is thin and tears easily. Cut slowly along the bone if you intend to save the tail.

How to remove the pelt from the legs

  1. Starting at the belly, cut along the underside of the forearms and legs of the squirrel.
  2. Now separate as much fat and tissue as possible from the hide by using your thumbs and forefingers of both hands to peel the pelt from the carcass.
  3. If you use a knife to do this, be careful not to cut into the hide.

NOTE: If you plan to keep the face and head area intact on the hide, then, like the tail, it is a delicate technique to carefully cut and peel without ripping the skin.

Save the Brains

Okay, you have removed the hide from the carcass. Good job! Save the animal's skull for the brains needed to tan its hide.

To preserve the brain, store the skull in the refrigerator or freezer.

Fleshing the hide

Now we begin the process called Fleshing. Fleshing removes the fat and tissue from the flesh side of the hide.

When fleshing a small animal like a squirrel, you can stretch and tack the hide flesh side up to a board or piece of plywood. Make sure the board is even and flat with no holes in it, as rough wood can rip the hide when fleshing.

Flesh scraping tool

Use a butter knife with a finely serrated edge to scrape the flesh and membrane off the hide.

The small serrations catch the fat and membrane as you lightly scrape the membrane.

Gently scrape the fat from the hide. If you use a knife, be careful not to cut or slice it when scraping. Cuts will ruin it while thinning it and cause you to punch through the hide during staking.

Using a fleshing tool

Start by coming into the animal hide at a 90-degree angle. Do not angle your blade like carving wood. That angle will slice and damage the hide. Instead, bring the knife in at a 90-degree angle, taking short downstrokes to remove the flesh and tissue. As it dries, it becomes easier to remove the tissue.

Keep at it until you remove all the fat, tissue, and flesh. Once you have done this, the hide is now "rawhide" and can be rolled up and put in a paper sack, in the fridge if you want, keeping it safe from dogs who love to chew on hides.

Removing the brains from the skull

Remove the brains from the skull of the squirrel. Put the brains in a plastic container with a tight lid and into the fridge. You may want to leave a description of the contents for the unwary if you have a communal fridge.

Squirrels do not have very much brain tissue. So, what I do to stretch the brains is add 1/2 cup of fresh water, rainwater if you have any, and bring the brains and water to a light boil, turn off the heat, set aside, and let the brains cool. (Boiling is a safety issue.)

Note: remember you are putting the brain mixture onto the flesh side. It will not hurt anything if you get brains on the hair side. But we want to work the cooked brains into the flesh side as much as possible.

How to Brain Tan a Squirrel. The Process

Once the brain liquid has cooled, rub the mixture into the flesh side of the hide. Do this until the flesh side is good and penetrated with the brain mixture. You can also soak a thin cotton cloth in the remaining brain mixture and lay it on the flesh side of the hide.

Then roll up the hide with the cloth and let it sit overnight in a cool, dark, safe place. Where the dogs, mice, and rats can't get to it. In the morning, roll it out and remove the cloth, wringing as much water and moisture as you can from the hide.

Find a nice warm, not hot, place to stretch the hide, and begin the Staking process.

Staking the Hide

The process of stretching is called staking. Staking softens the hide by manipulating the fibers in the hide by pulling and stretching.

Begin by pulling with your hands from all corners of the hide. Then stretch it over the arm or top of a chair. You can drive a wood stake 1-2 inches in diameter into the ground to about waist height.

Use a wood file to round off the point until it is smooth as a broom handle. Use the rounded end to stake your hide. Be gentle with the staking; do not punch a hole by using too much down pressure.

Stake and stretch the hide until completely dry. " I cannot stress this enough!"

Your hide should be wonderfully soft now. Run your hands over the hide; if you feel rough spots, you can soften these by using light-grit sandpaper, or a smooth small river stone to burnish (polish) the hide. You can always re-brain and re-stake the hide if needed.

Smoking the squirrel hide

I'm sure you are wondering what the heck smoking the hide means? Cold smoke sets the brains into the hide and helps to make the squirrel hide resistant to water. (Not waterproof.)

Two things leather does not do well with are water and heat. Smoking the hide also helps to preserve the tanned hide.

Too much of both will ruin your hide. Think of drying leather boots near a fire. If they get too hot, the leather shrinks and can crack. If it gets wet afterward, you can always dry it by going through the staking process again. So, remember to be careful with heat and fire around your hides.

How to smoke a squirrel hide

Build a tripod out of wood poles. 1 " in diameter. The apex of the tripod is 3 feet high. Then make a small fire pit beneath it.

Bring the edges of the pelt together in a tube shape. The brain-tanned side is on the inside. You can use clothespins and paper clips to hold the pelt into shape. Or you can sew the edges together temporarily with a few stitches of thread.

Tie the tanned pelt to a cord and hang it from the tripod directly over your fire pit.

NOTE: Make sure the hide smoking is done outside and not inside the house or a closed space. If breezy, cover the tripod using a folded tarp or dampened bed sheet. Cover the tripod high so it doesn't catch fire but blocks the wind, keeping the cold smoke on target.

“The scrotum of a buck, tanned with the hair on, makes a good tobacco-pouch.”

~Horace Kephart
Eating Mouse at First Circle Survival Camp

Watch this video as Mitchell and Tostig, Students of First Circle, share their view of what it's like to eat the fried mouse they trapped at camp.

In Closing

That's all there is to it! Leave me your questions in the comment section below. If you have tips to add about your hide tanning project, we'd love to hear them.
Happy Brain Tanning!

Additional Information

  • Survival Skills Training
  • The Amazing Blue Elderberry
  • Staying Alive in the wild
  • How to Harvest Stinging Nettle Stalks
  • Best Bow Drill Woods
  • Best Survival Knife
  • Wilderness Adventures for Teenagers
  • Survival Bushcraft

Written by Mark J. · Categorized: Outdoor Survival School

Jul 18 2022

The Best Bow Drill Woods

The best Bow Drill Woods
The Best Bow Drill Woods. Photo of cottonwood fireboard with a live coal resting on a coal catcher.

A bow drill made from the best wood will create hot coal faster. Imagine you’re shipwrecked like Tom Hanks in Castaway, lost in central Texas, or stranded on a Pacific island with no matches or a lighter. You can't boil your drinking water or cook the mouse you trapped for your survival stew without fire. What are you preparing to do? In your panic, you remember reading about rubbing sticks together to make fire. But what type of wood would you use for the parts and pieces of your bow drill kit? And what, you ask, are the best bow drill woods anyway?

"The Best Bow Drill Woods"

These first few kinds of wood listed are great bow drill woods, but not necessarily the best in every situation.

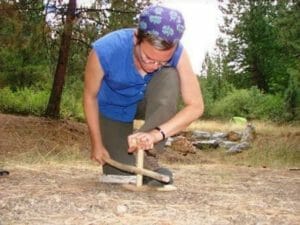
Woman student making fire with a cedar bow drill kit best bow drill woods
Excellent Bow Drill Form

Cedar

Depending on where you are stranded and the wood available, there are two main factors that determine the most effective bow drill wood.

  1. Availability
  2. Species of wood

In a forest, you might expect to find dead and dry limbs from a tree such as a cedar. As a matter of fact, I use Western and Southern Red Cedar, trunk, and limb, to teach fire-making using a bow drill at my camps in California, Oregon, and when I taught in Texas. Cedar is plentiful across the US.

Red Cedar is a good bow drill wood.

Western Red Cedar, common in Oregon and Washington, is an exceptionally suitable bow drill wood. All parts of the bow drill come from this tree. To the First Peoples of the Pacific Northwest, Red Cedar is known as the 'Tree of Life'.

Even the cordage for the bowstring is made from Red Cedar. All cedar species can be used for a bow drill, but cedar wood is not the absolute best.

Why are some bow drill woods better than others?

Hardwood is extremely difficult to use in friction fire making. The harder the wood, the more difficult it is to create friction. Take Oak as an example.

Jank's hardness rating for Red Oak is 1290 to Red Cedar’s hardness rating of 320. That is a stark difference in hardness. So, we can say with confidence that success starts with a good wood choice.

Are softwoods the best choice for the bow drill?

Yes, softwoods are the right choice for bow drill wood. Take a look at these woods. These woods are your ideal choice for a bow drill.

  • Basswood (Tilia americana)
  • Cedar - search Cypress family (Western Redcedar (Thuja plicata ), Eastern Red Cedar (Juniperus virginiana), Incense Cedar (Calocedrus decurrens), Eastern White Cedar (Thuja occidentalis)
  • Cottonwood (Populus).
  • Hau (Hibiscus tiliaceus)
  • Redwood search Cypress family (Sequoia sempervirens)
  • Yucca (Yucca)
  • Willow (Salix)

Cypress

Coastal Cypress is a fire-resistant tree you can find along the California and Oregon coasts. Fire bow success with Cypress takes more practice to be consistent with making a coal, in my experience. Cypress, like other harder-softwoods, benefits from a bit of help from fungi. Fungi weaken the structure of the wood, causing it to soften through the process of rot.

Brown Rot Fungus

Conifers are evergreen trees that naturally succumb to wood decay caused by parasitic fungi. Wood decay is caused by the most common fungus, Brown Rot fungus. Decay can be beneficial in friction fires by softening the wood structure, thereby making the wood, especially the spindle part of the bow drill kit, softer. In this way, the spindle can create more friction with the fireboard.

The spindle will become weak and useless if it has too much rot. But just the right amount of decay can be helpful in our quest for success with the bow drill. The species of Cypress trees are abundant in the southern US. But Redwood and Cypress pale in comparison to the most effective bow drill woods.

The Best Bow Drill Woods Friction Fire Combinations

Blue Elderberry Spindle on Cedar Fireboard

My favorite spindle material for the bow drill is a dry Blue Elderberry spindle on a cedar or cottonwood fireboard. It’s the best combination of tree and shrub I have discovered.

One of the benefits of using a spindle from an elderberry is that the soft pith material in the center of the branch creates a coal at a lower temperature than a solid wood branch. Such as Cottonwood.

That, of course, is why Yucca, which also has a soft pith, makes a great handrill.

A good dimension for a bow drill spindle is: a straight branch three-fourths, 3/4" in diameter (19mm) or so, and about 9-10 inches in length.

Can the spindle be longer or shorter, narrower or wider to work? Yes, it can.

Yucca

Try a Yucca spindle on a softwood hearth board for creating an ember with your bow drill. The Yucca flower stalk has one of the lowest ignition points for a spindle you can use. If you have access to the dry seed stalk of the plant, you are prepared for success.

You can use a Yucca spindle with, for example, Cedar, Redwood, or Cottonwood. But with other woods such as Cedar on Cedar, which has a considerably higher ignition point at around 800' degrees F. Compare the lower ignition point of Yucca at around 200' degrees.

Be ready to work harder to crank out an ember.

Yes, a Yucca spindle is one of the most effective bow drill woods you can use.

Cottonwood is the best bow drill wood.

Based on my experience in the West, Cottonwood is the best bow drill wood for the ease of creating an ember with the bow drill method.

Cottonwood

In Oregon, the native Black Cottonwood (Populus balsamifera) is the most common.

In Texas, Populus deltoides and Populus fremontii are native trees. These species of cottonwood are also found in California and the Southwest.

All cottonwood species in the U.S. will work with this challenging fire-making technique. Consider yourself both lucky and blessed if you have access to this amazing tree.

Willow

In the genus Salix, willows are found in every state of the union, including Alaska, with the only exception being Hawaii and other tropical regions where willows are not native.

A popular wood and easy to find along creeks, rivers, and wetlands. Willow has a low ignition point for friction fire-making. And when conditions are right, one of the finest bow drill woods.

Basswood

American Basswood grows in the northeastern US. "It also grows from southeast Manitoba east to New Brunswick, southwest to northeast Oklahoma, southeast to South Carolina, and west along the Niobrara River to Cherry County, Nebraska. According to Wikipedia: "A species of linden, Basswood is often referred to as lime."

For the Midwest and further east, basswood is an excellent choice. During a winter spent in Wisconsin, I was able to harvest basswood and successfully make a bow drill fire with it. It has the same properties as cottonwood and is a smart choice for your bow drill kit.

The best bow drill wood

One of the best woods for a bow drill is Hau, Hibiscus tiliaceus, a flowering tree in Hawaii (we mainlanders know it as Hibiscus).

When dry, the carved wood is light and smooth, similar to balsa. Hau has all the characteristics needed for one of the most effective friction-fire woods. Hau is a soft, non-resinous wood that grows along the coastlines of many Pacific islands.

I discovered the uses of Hau for myself when collaborating on the Discovery Channel's Man vs Wild, during the Desert Island episode.

 A bow drill spindle - wood discovery

At camp, we teach over twenty different shrubs and trees of North America that will work with the bow drill. Any discovery of another wood for the bow drill is exciting! A few years ago, at our Survival Camp for Teenagers, the apprentice staff and students discovered a wood that was not on our list of bow drill woods.

Over time, bow drill spindles wear out from use.

As the cedar spindle wore out, a new one was needed. This was a dilemma. The group needed to find another spindle. But there were no cedar or other woods they were familiar with to be found. The teens thought about the properties that would make an effective bow drill spindle.

And they found a solution! A piece of dead and dry Shasta Red Fir (Abies magnifica) that fit their requirements. Because the fir was all that was available, they decided to give the Red Fir spindle a whirl.

Sweat, persistence, ingenuity, and perseverance

With much sweat and persistence, the teens succeeded in creating a burning coal which they then transferred into a tinder bundle made from a plant called Horse Lichen, Bryoria fremontii.

Bryoria fremontii, for you Tinder buffs. Bryoria grows in the same area as the Shasta Red Fir in northern California. The teens' ingenuity and perseverance made them successful in their quest for fire. B. fremontii grows in Oregon as well.

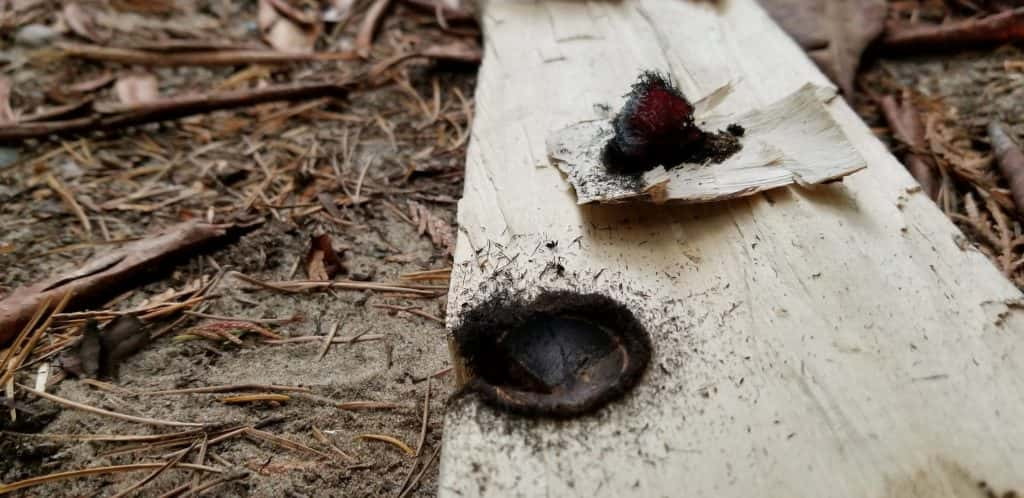
Bark of Pine used for a Bow Drill Fireboard

This season, our staff member, Carter Hayes, was able to produce an ember using a thick piece of outer bark from Jeffrey Pine (Pinus jeffreyi).

This is no small feat. Having tried using a variety of different types of bark, I had no success. Watch Carter demonstrate his bow drill technique. Not once, but twice.

Pine is a softwood. Why is pine not on your list of bow drill woods?

This is an excellent question.

The problem with using pine (Pinus) wood for friction is that pine contains an abundance of pitch. Pine pitch is a lubricant. Much like adding oil to a squeaky door hinge, pitch acts the same way. It lubricates. Pitch is the sticky stuff that gets all over your hands when you're handling pine.

Can you use Pine Wood for the Bow Drill?

I would not recommend it for a beginner.  As I said in the above paragraph, because of pitch, you can have friction issues due to pitch acting as a lubricant.

The key to using pine wood, in my experience, is harvesting wood from older trees where the bark has peeled off. Stay away from the limbs, but use the interior wood of the trunk to carve out your hearth board and spindle.

For Now Focus on the Best Woods for the Bow Drill

For now, look for softwoods other than pine. When you have mastered the best woods for the bow drill. Try your hand at pine. You might be surprised at how successful you can be.

Bow Drill Fatwood Video

Since we're on the topic of pitch, here we have taken it to the extreme using a bow drill fireboard impregnated with pine resin. This is known as Fatwood. As you know, friction is reduced by pitch.

What Carter is attempting to do is even more difficult than getting an ember using pine bark as a hearth board.

Video of Carter with Fat Wood Fireboard

Douglas Fir Bark. Can it be done?

Yes, Carter is at it again. During July's teen camp, we found a promising candidate: a solid piece of Douglas Fir Bark (Pseudotsuga menziesii). Watch our YouTube video as Carter spins an amazingly short cedar spindle (I don't know how he can use such a short spindle) on a Douglas Fir fireboard. Success? You be the judge.

Carter making a smoking ember with a Douglas Fir hearth board.

In conclusion

No doubt about it, the woods I have listed in this post are some, if not the best, woods for creating an ember with the Bow Drill.

Are there any other woods that are as good or even better? Perhaps, though, the right bow drill wood might be the one you have growing in your backyard or neighborhood.

Have a question? Drop it in the comments section below.

Learn the Bow Drill technique at First Circle Camp and the Oregon Survival School.

More helpful Reading on Wilderness Survival Training

  • Outdoor Winter Survival Training
  • Survival Knowledge Trees for Survival
  • Fire Craft for Teenagers
  • Learn the Bow Drill 
  • How to Harvest Elderberry
  • Fire Plow Wood Types
  • Living the Wilderness Way
  • Student Testimonials
  • Survival Bushcraft

Written by Mark J. · Categorized: Outdoor Survival School

Jun 10 2022

Cold Water Immersion Therapy

Dang! That water is cold! As a sometimes cold-water immersion therapy enthusiast, I enjoy cold water plunges to temporarily reduce muscle soreness and joint pain after a long hike or workout. According to studies on the effects of cold-water therapy on humans. Submerging one’s body at temperatures of 59F or colder offer the best results for temporary relief of inflamed muscles and joints. And as you can see in the first video. Safely submerging the body in snowmelt water. Gives the psyche a boost in positive mental attitude. And it’s also great fun!

Cold Water Immersion Therapy

Benefits of cold immersion water therapy

Ongoing studies suggest that benefits of fully immersing the body in icy water can,

  • decrease inflammation
  • improved mood and cognition
  • improved metabolic health

Further studies are needed. But current science suggests that cold exposure also supports cardiovascular, immune, and neurocognitive health.

Cold water immersion therapy. Staff swimming in cold mountain lake.

Repeated exposure to cold

With repeated exposure to cold the body can become climatized. As our body adapts to heat. It can also adapt to cold. Within limits, of course.

Cold shock!

Cold shock is the body’s automatic response when suddenly immersed in cold water. During the body's response there is a risk of choking caused by the lungs quick inhale, filling the lungs with water.

Cooling the body to long

Cooling our bodies core to long risks becoming hypothermic. So, gradually build up your endurance to the shock of cold water.

You can do this by slowly getting used to the waters temperature. Try a minute up to the knees. Then two at the waist. Try several minutes submerged up to your neck. Then gradually work your way to the 5 to 10 - minute mark of immersion time.

Use breathwork

Use breathwork to relax and release the tension of the body. As you enter icy water pay attention to where the tension goes. Often you will notice the tension begins below the waist around the groin.  As you submerge deeper, the stomach, sides, shoulders, and neck, become tense.

Watch how other people enter cold water. It is a good way to see where the tension in the muscles manifests.

What is breathwork?

Breath gently in and out as you enter the water. As the tension builds use your breath to help move the tension out of the body. Do this by rapidly increasing the exhaling and inhaling of air. Increase the breath rate, inhale, and exhale rapidly only as needed. To help relax the tension you’re feeling.

In other words, use breath to push out the tension. We're not hyperventilating. We're using breathwork to help us ease and relax to the shock of cold water to the body.

Releasing tension

Every time you feel tension in the body. Use your breath, and roll your shoulders, back and forth to release tension. And little by little relax into the water.

  • increase breath rate
  • breath rapidly in and out to relax the body’s tension
  • roll the shoulders, neck, front to back.
  • relax into the cold by letting go.
  • breath slower and deeper

Our body’s Response to Cold Water Immersion

Typically, our body’s response to full immersion of cold water is an initial gasp, followed by rapid, uncontrollable breathing. An increase in heart rate and blood pressure.

A hard punch to the stomach

The shock of cold water to the body can be similar to a hard punch to the stomach. Which takes away your ability to breath normally and may cause a panic response.

The more you are able to relax the body and calm the mind. The easier you will be able to function in high stress situations.

Prepare the survival mind

I use water therapy to Prepare the Survival Mind both physically and mentally. In the event we find ourselves in cold water we want to know how our body reacts to this super shock. And how we can mediate our response to not panic. During First Circle Survival Camp students have a opportunity develop the survival mind.

Safety First

There are safety issues to consider with prolong body exposure to cold or icy water. As a therapy, maximum immersion in 59F or colder water is around 10-15 minutes. Don’t stay in long enough to make your teeth chatter or become disoriented.

If you become dizzy or find it difficult standing up. You’ve been immersed to long. Use the buddy system to stay safe.

Cold water survival training

Since I began teaching wilderness survival. We’ve used water both as an instructional tool and therapy for relaxing sore muscles. During teen camp and adult courses, we have had the opportunity to practice cold water survival and toughen up both our psyche and body in freezing cold snowmelt water. Brrr!

Staff Got Grit!

In the video at the top of the page. Our two staff members Khalil, and Carter, got grit! They have spent weeks adapting their body's to the shock of cold water. While having and excellent time at it.

Cold water immersion can shift a person’s state of mind. Shocking, yes! But it can have a positive effect on our psyche if done correctly. And also a relaxing effect on the body can occur as warm blood returns from the core to the body’s extremities.

During this time there can be a euphoric feeling of deep relaxation.

Warming the body after cold water therapy

I sometimes become chilled after cold water therapy especially during the winter months. My recommendation is have dry clothes ready to put on after drying off. Don't wait too long before dressing as you can begin to chill quickly.

A hot shower or bath to heat up the core is a great help. A hot drink of tea or soup is just the ticket to begin the body’s warming.

Cold water challenges

Are you ready for your own cold water challenges? If you have questions or need a little more detail on breathwork, how to relax the body, or other questions Please leave your question or comment below. Thank you!

Resources

  • Cold Exposure Article
  • Cold Water Swimming-Benefits and Risks: A Narrative Review
  • Water immersion recovery for athletes: effect on exercise performance and practical recommendations
  • Cold Water Therapy

Additional Links

  • Survival Skills Weekend
  • Be Prepared for Winter Driving
  • We Train Here

Written by Mark J. · Categorized: Outdoor Survival School

Jan 25 2021

Fire Plow Wood Types

Wood for fire plows can be found from Hawaii’s warm beaches to Oregon’s misty coastal forests. What are the right types to use with the fire plow method? The fire plow is a Polynesian fire-making technique. This ancient fire skill developed in part due to native woods.

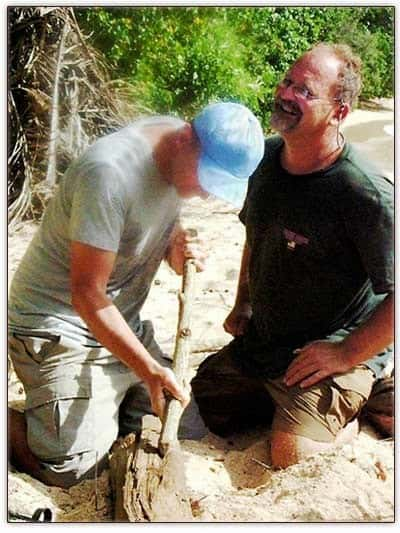
Fire plow wood types. Graham Strong and Mark Wienert Man Vs Wild
Director Graham Strong with Mark Wienert on Man Vs Wild. Graham is trying his hand with the Fire Plow.

Fire plow wood types

This early fire skill developed in part due to the native woods available on the islands of the Pacific. Wood such as Hau, traditionally used in Hawaii, is not found as a native plant on the US mainland. However, there are still many local kinds of wood that have similar qualities that can be used in place of Hau.

Hawaiian Hau wood

Hau, (Hibiscus tiliaceus) is the native Hawaiian species used for the base stick or baseboard. Hau is lighter in weight and similar to Balsa wood when compared to our native woods, such as Cottonwood, that grow on the mainland.

The Maori use Kaikomako

In New Zealand, the Maori people use Kaikomako, (Pennantia corymbosa), a small deciduous forest tree, as the stick or plow.  I understand that Kaikaomako can be used for both the stick and the board. Though having not used these two woods together myself, I am unable to verify it. If you have tried Kaikomako for your whole kit, please tell us about your experience in the comment section below.

 Alternative woods

Cottonwood (Populus species) has enough in common with Hau to make Cottonwood a reasonable alternative wood for Hau. But it's not the best option, as you'll find out.

What is the fire plow method?

The fire plow, in my experience, is the simplest and most basic way to start a fire by friction. It's an exciting way to make fire because of the simplicity of the process.

The fire plow is the traditional Polynesian technique of making fire. While the people of Oceania, specifically a Samoan King I know, make it seem easy. However, believe me when I say it is not, unless you grew up getting strong the Maori way.

Here is useful information about the Maori fire plough and the wood used.

How the fire plow works

The simplicity of the fire plow comes from the fact that you only need two parts for your fire kit. Like the hand drill technique common in the America's, which uses only the drill and hearth board. As opposed to the bow drill, which is a more complicated but easier way of generating fire.

The Plow and Fireboard

The two pieces of wood required for your kit are the plow and the fireboard. The fireboard is made of softwood. In the traditional Hawaiian method, the plough or blade itself is made from hard wood called Olema.

A plow stick, also called the blade, is pushed with short strokes beginning at about the board's middle. And pushed outwards towards the end of the fireboard away from you. A V-groove is created by the friction of the plow head.

Push the plow in one direction

Push the plough in only one direction. Friction by pressure creates heat by using your upper body strength and pushing the plow forward against the fireboard.

The friction will create a powder or dust. The dust is pushed into a pile with each forward push of the plow at the end of the groove on the fireboard.

This motion is repeated in faster-faster and shorter strokes until the tinder dust begins smoking and has formed an ember. Once you have a smoking ember, tap the fire board a couple of times to consolidate the dust around the ember. Then tip your hot ember onto your tinder bundle and blow it to flame.

Alternative woods for the Fire Plow

  • Basswood
  • Cedar
  • Cottonwood
  • Poplars
  • Redwood
  • Willow

As I mentioned before, Cottonwood or any Populous species will work as an alternative fire plow wood. The similar structural qualities of Hau and Cottonwood make Cottonwood an excellent choice.

Before I made fire with Hau, I learned using our Oregon Red Cedar for both the plow and the fireboard. At the time, all I had to work with was my bow drill stash at home. I did some research and discovered that cedar would work in place of Hau.

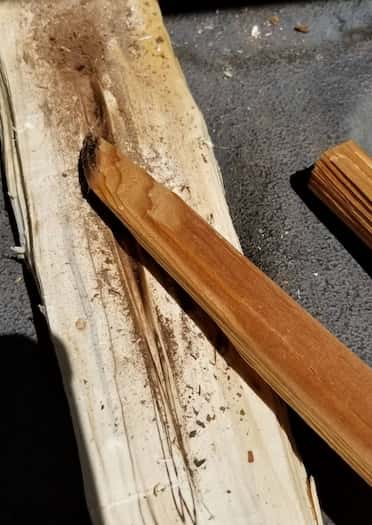
fire plow cottonwood fireboard with red cedar plow

The best alternative woods for the Fire Plow

I reached out to my good friend Joe Lau, Phyre Master, and primitive fire skills instructor par excellence. And asked him what woods he used for his demonstration of the Fire Plow. And lucky for us, Joe shared his awesome Phyre Dojo wisdom.

Fire Plow Base Woods

  • Yucca
  • Sotol
  • Hickory
  • Bamboo

Although Yuccas aren't "local", they are EVERYWHERE in New Jersey due to landscaping choices. For demos and teaching, I will only use Yuccas and Sotol. Sotol can be bought on ETSY, but you have to tell the guy exactly what you're looking for: 2ft long cylinders that are as large/wide diameters as possible.

"Locally, in NJ, I have been successful with large Cattails and Velvetleaf plant stalks as Blades and Catalpa and Pawpaw woods as bases. I have also been successful with a Hickory base with a Cattail stalk. Surprisingly, I got some old BAMBOO on BAMBOO to go. I also don't experiment enough with this method..."  ~Joe Lau

Fire Plow plant stalks for plow blades

  • Cattail
  • Velvet Leaf

Lastly

In my article The Best Bow Drill Woods I laid out the best softwoods to use. Many of our local woods can be used successfully for the fire plow method. You're only limited by the width, depth, and length of the wood. To be successful, be sure to use a recommended softwood species and make sure the wood is completely dry.

Links

  • The Bow Drill
  • Survival Knowledge
  • Best Survival Knife
  • Fire-Craft
  • The Amazing Blue Elderberry
  • Adult Camps
  • What is a Debris Hut?
  • Government Courses

Written by Mark J. · Categorized: Outdoor Survival School

Dec 16 2020

THE EDGE Survival Camp Review

You’ve read about it, thought about it, and now you’re ready for THE EDGE challenge at Lifesong Wilderness Adventures Knife-Only adventure camp. Let’s hear in their own words what students have to say in the following reviews of their challenging experiences at THE EDGE.

survival adventure reviews

THE EDGE Survival Camp Reviews

"I have been running this signature challenge course since 2006, and true to its nature, it has become a rewarding experience for most. The term, Extreme Challenge, refers to the type of training that prepares you. It's not about extreme risk. In fact, the camp prepares you to survive in the backcountry of the wilderness with our signature, Knife-Only Training." ~Mark J Wienert

Reflections of THE EDGE. A Review

The Will to Live - Part 1. Skills

by - Joshua Poole

“This extreme, intense challenge is what drew me to the wet and wild world of southern Oregon. Some may be interested in survival skills for chaotic end of the world scenarios, and others prefer to study the materials to aid in outdoor emergencies. I’m hoping I never have to deal with either but being able to make a fire, a shelter, a trap for food, just seem like good skills to acquire….” The Will to Live.

Lesser Man vs. Wild Review

by - Kevin Max. Editor of the 1859 Oregon Magazine.

"What mattered for the moment was that I had been kidnapped by a benevolent faction of outdoor survivalists, who had sharp knives and more knowledge about how to get along in wilderness than I ever would"....Lesser Man vs Wild

Knife-Only Training

THE EDGE is the finale of our Circle Series of survival training. The first two camps in the Circle Series prepare you for this final advanced level of survival training. By starting with the basic skills of wilderness survival, you will advance through our camps to confidently apply your knowledge, skills, and mindset to survive and thrive using only a knife.

With this solid training, you are ready for this Knife-Only adventure. You begin with First Circle Camp, then Advanced Survival Training, which is the Second Circle. Then the finale is graduation from THE EDGE!

THE EDGE Challenge

"Take the challenge and join us in this rigorous, demanding, and empowering six-day survival challenge, putting your well-earned mastery of survival knowledge, skills, and experience to work. We will be there to support, guide, and strengthen you each step of the way. If you are looking to challenge yourself.  Join us for THE EDGE! "  ~ Mark J Wienert

Start Here. First Circle Survival Camp

Read more reviews in the comments section below.

Read On!

  • More Student Testimonials 
  • Outdoor Winter Survival Training Course
  • Visual Mantracking
  • Cold Water Therapy
  • The Debris Hut
  • Man Vs Wild
  • Survival Bushcraft
  • Survival Tip

Written by Mark J. · Categorized: Outdoor Survival School

  • « Previous Page
  • 1
  • 2
  • 3
  • 4
  • Next Page »

Lifesong Wilderness Adventures

PO BOX 149
Blue River OR 97413

Monday-Friday 9AM-5PM PST

Contact Mark

Privacy Policy - Media and Press

Lifesong Wilderness Adventures Oregon Survival School Logo.

Sitemap

Guide Outfitter Recognized Professional Mark J Wienert.

Guide Outfitter Recognized Professional

Mark J Wienert

Copyright © 1994-2026 · Lifesong Wilderness Adventures · All rights reserved.